Purpose and function
The printing process consists of forcing a viscous print paste through the open areas of the screen with a flexible, synthetic rubber squeegee. The rubber blade, which is contained in a wooden or metal support, is drawn steadily across the screen at a stable angle and pressure. If the screen is too wide to allow one operator to reach all the way across it, two operators may work together, one on either side of the table. The pressures exerted by the two must be as similar as possible. The amount of print paste passing through the screen can be controlled in several ways. There are various factors that can affect this, some of which are outlined below.
- The ‘mesh’ (threads per inch) or ‘raster’ (threads per cm) of the screen fabric controls the passage of the paste. Generally a coarse mesh allows more paste to pass through than a fine one.
- The fraction of open area in the screen fabric; this depends not only on the mesh but also on the yarn diameter and the effect of subsequent treatments, such as calendaring.
- The hardness and the cross-section of the squeegee blade; a hard rubber squeegee with a sharp crosssection is suitable for outlines, whereas a soft, rounded blade applies more paste and is suitable for blotches.
- The hardness of the printing table; if the top of the table is firm a soft squeegee is probably necessary, whereas with a resilient table surface a harder squeegee is preferable.
- The viscosity of the print paste should be within the constraint of the requirement. For a good characterization, the viscosity can be varied, and thinner pastes can be passing through the screen pores more readily than viscous ones
- The number of squeegee strokes; from two to four strokes are usually applied to get a good result.
- The angle and the pressure of the squeegee are two more important factors, that influence the paste passing the screen.
- The speed of the squeegee stroke also can be controlled.
All these variables should be taken into consideration, in conjunction with the nature of the design, when printing the chosen fabric. Before printing begins, the screens must be carefully positioned on the fabric. The area printed by a screen (screen repeat) must fit exactly alongside the adjacent one, as a light overlap is preferable to a gap. With flat-screen printing this is not automatically achieved. The differently coloured areas must be registered and, again, a small overlap is usually allowed. To achieve accurate registration it is common practice to attach a bracket to the frame, which is located aligned with the fittings, known as ‘stops’, on a guide rail along one edge of the table. The stops are spaced exactly one (lengthways) screen repeat apart along the whole length of the table. Two adjustable screws set the distance of the frame from the rail. When screen printing is carried out by hand, alternate repeats are normally printed along the full length of the table and then the gaps are filled in. This allows time for the print paste to penetrate the fabric and partially dry before the frame falls on the next printed area. If the design includes an outline this is printed first, to achieve maximum sharpness and as an aid to accurate fitting. The screen is then washed and the second screen introduced to print the second colour. The blotch screen, if there is one, is usually left until the end as the larger amount of colour is more likely to cause loss of adhesion between fabric and table, with subsequent loss of registration.
Design
Before a design can be printed, it must be reproduced on the screen in a suitable form. One screen is required for every colour in the design, except when the fabric is dyed to the background colour (known as the ground) before or after printing, or when a third colour is produced by one colour being over printing on another. When the background colour is printed it is termed the ‘blotch’. The steps necessary to take an artist’s original design to the stage of being ready for screen printing are explained under the relevant topics.
Making the screen
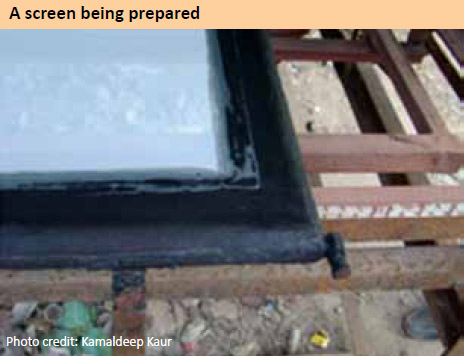
The selected screen fabric is cut to size and stretched, for which pneumatic tensioning equipment may be used. It is then fastened to the frame with a suitable adhesive and degreased (for example, by soaking with 5% caustic soda solution, rinsing and neutralizing with dilute acetic acid). A flat screen is coated by positioning it against a wall and applying the layer of photosensitive viscous polymer solution with the aid of a smooth, straight-edged trough by moving the tilted trough from the bottom to the top. The coated screen is dried in a dark cupboard, ideally on a horizontal shelf, with a draught of cool, dust-free air. The coated screen is sensitive to light, and photographic dark room conditions with safe lights are required during the exposure and developing stages.


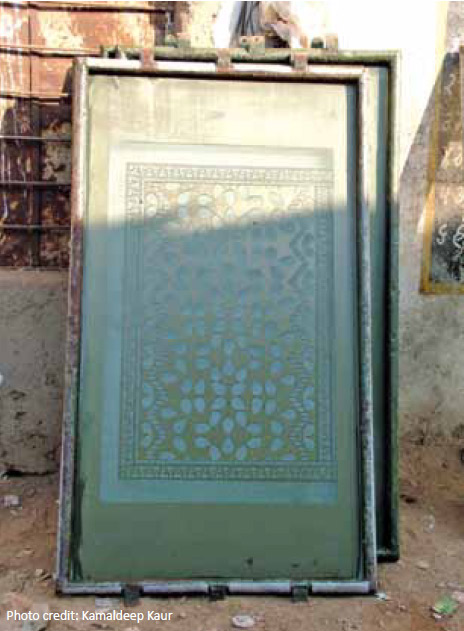
Frequently, a number of repeats are to be reproduced on a screen and in these cases it is normal to use a step-andrepeat machine. A positive of the single repeat is fixed to the glass of a light table and the remaining area of glass is blacked out with opaque paper. The coated screen is mounted on a carriage, the sideways movements of which are carefully monitored. After one exposure the screen is moved the exact distance required for the next repeat and a second exposure is carried out, and so on until the screen is completed. (The contact between positive and coated screen is often improved by employing a flexible cover and reducing the pressure between glass and cover.) The screen is then soaked in a tank of water and lightly sprayed to remove the unexposed polymer. After drying and painting out any small holes (pinholes), it can then be reinforced with lacquer (cellulose or polyurethane), the lacquer being removed from the printing areas by suction.
As an alternative, some photosensitive polymeric coatings can be further hardened after ‘photo patterning’ by a second exposure to light or by a heat-curing process.
Leave a Reply